Window Awning Installation
Tips For The Do-It-Yourselfer
This page is about the simple steps you need to take to install
an aluminum window awning.
Flex Pan Window Awning Installation
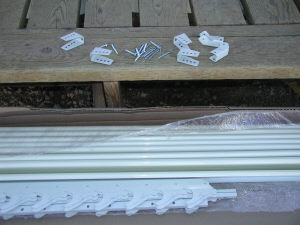
These are the parts that make an aluminum window awning. The photo shows
the brackets, arm connectors and cotter pins on top. Below are the flex
pans, stringers and arms.
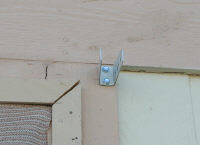
The first step is to attach the top brackets. They belong at the top
corners of the window and are held in place with 11/2" sheet metal screws. If the window has an aluminum frame that is exposed these clips can be installed
right over the frame for extra strength. Small windows like this one
require just two clips on top. Larger windows will require more clips to
be installed.
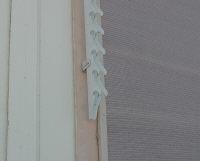
Attach a stringer into each top bracket using the cotter
pins provided. The brackets have multiple holes. I use the outside hole most
of the time. You situation may require a different set of holes. Some awnings
may have more stringers and support arms. If you are covering multiple windows
space these between them. If it is one big window use the stringers without the
support arms. Your awning may come with three stringers and two support arms, in
this case the middle stringer just needs to be centered.
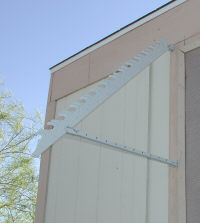
The return arms need to be assembled as shown before they are installed. Use the cotter pins provided with the window awning. The spacing between
the holes is the same so it does not matter the end you attach the brackets to.
There are two ways to plan for the placement of the bottom
brackets. These window awnings can be folded down to cover the window if you
leave your home for long periods of time. To set the brackets for fold down, I
attach the bracket to the stringer with a cotter pin and then mark the spots
where the screws go with a pencil. I then take the bracket off the stringer and
attach to the wall where my marks were. Do this with both sides.
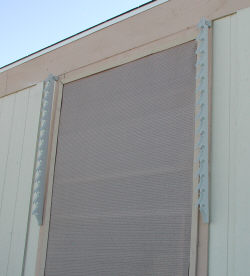
If the window awning is not going to be lowered the bracket placement is not
critical. I usually try to make the return arms look level. I mark
one side and then use a tape measure to place the other side in the same
location.
Window awning
installation page 2
Window awning prices
top of Window Awning Installation