Oval Installation
Tips For Installing An Oval Pool
Cantar Oval Installation
Today we installed an 18' x 33' Gilbralter, Cantar, sold by Leslies, and I thought to take a few photos. I started taking photos after the grass was removed and the ground completely level.
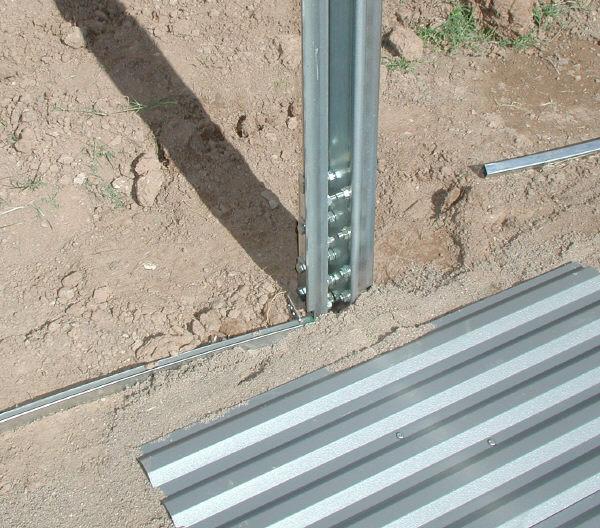
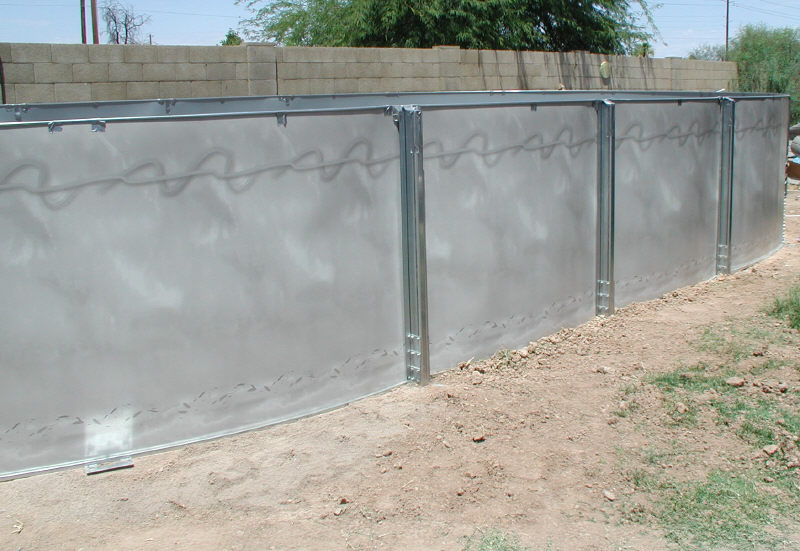
The first photo shows the massive strength of the buttress free design. An extremely heavy U-channel is used for both the vertical and horizontal brace supports. My wife had made the comment to the customer about each assembly being so heavy it took two men and an ape just to move them. As I was carrying one to the pool area I asked where my two men helpers were. They are heavy.


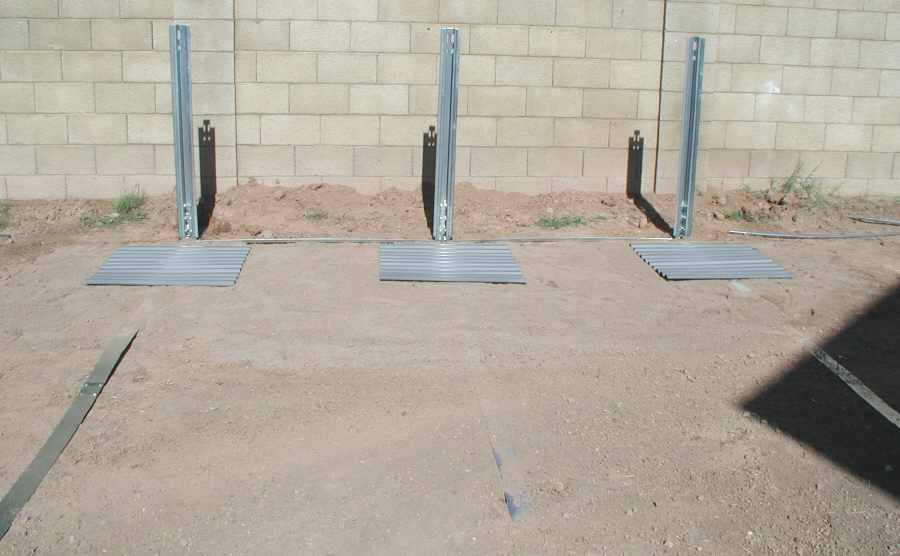
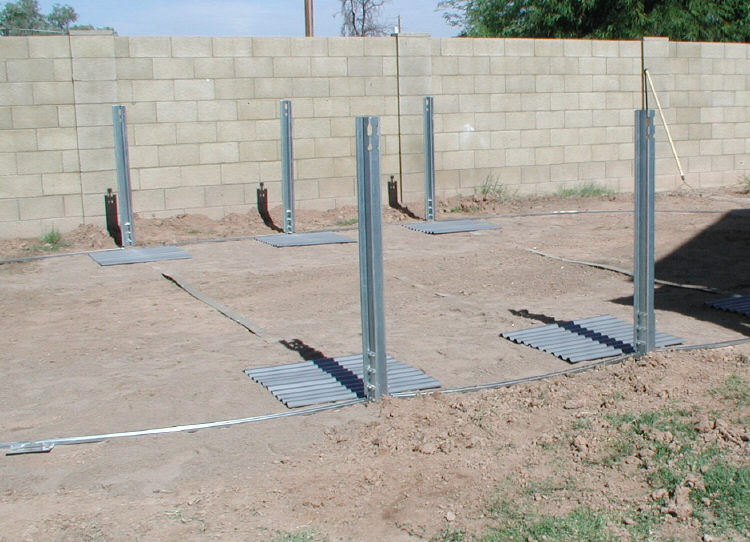
The next two photos in this oval installation are the brace assemblies installed. I start by laying the entire brace system out on top of the ground. I then mark where the trenches will go and move everything out of the way. When the trenches are dug I set a 12" patio block in the rear. At this point I use a laser level and level the trench and the block. The brace channel measures 3". If the ground you leveled reads a 6 on the level stick the trenches and blocks should be set at a 9. When the trenches are all level the braces can be set back into place. I recheck all the all measurements to make sure the assembly is square. I then recheck the level at the front and rear of the channel. This time I measure from the top of the channel, ground level, so my number would be 6.


This photo shows the pool ready for sand. The end footplates have been leveled and the ground treated with grass killer.


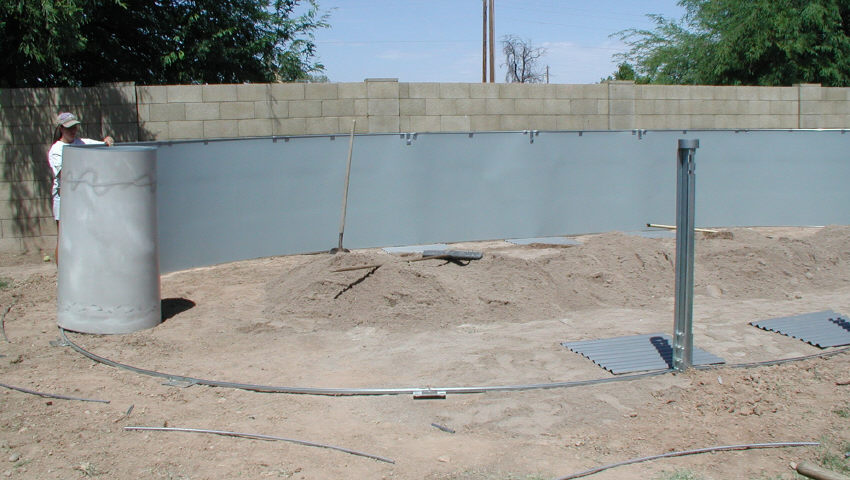
We have moved about 7 tons of sand and started to unroll the side wall. Notice the sand is in the center of the pool area, no where near the bottom rails. The last thing I want is to be filling up the track with sand as I am putting the wall in.


Here you can see the interlocking rods getting installed and taped. They keep the wall from blowing over and also allow an adequate structure to stretch the liner over.


Here the wall has been installed and a lot of duck tape used to hold the wall tight to the side braces and to protect the liner from getting torn by the braces. Be very careful when doing an oval installation not to let the side of the pool blow down. This is one of the few pools I would do with just the interlocking rods for support. The majority of my oval installations involve building the entire frame of the pool before installing the liner.


In this photo the sand has been spread and smoothed. I do my final smoothing with a soft push broom. Once I climb out of the pool I do not get back in to install the liner. The sand base on this pool will always stay this smooth, or close to it.


We install the liner from the outside of the pool. We pull it over the rods to where the bottom is perfectly smooth and the overhang on the outside is the same all the way around.


This is how the liner looks from the outside of the pool just as we start the hose running. Having the liner overhang even on the outside assures the liner is properly centered. This is critical with an oval installation.


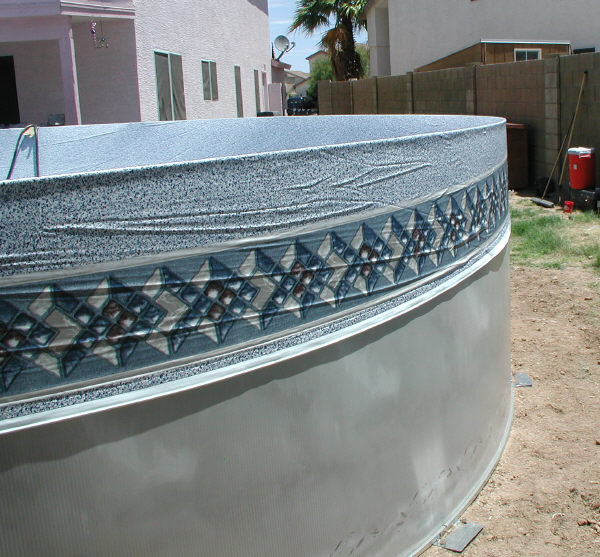
After a long day the pool is done. Although this photo does not show it, the steel side brace uprights have been capped with the same uprights that are used on the ends.


There are many correct ways to build a pool. This is just my way. I hope it will give you some ideas for your own install. It is impossible to go into every detail without writing a book. There are also many different makes and models and they all install in there own unique way. But I hope this helps some.
We do pool and liner installations all over the state of Arizona. Check here for prices.
Below are some more of my illustrated installation pages with plenty of help and advice.
Diamond Star Above Ground Pool
Above Ground Swimming Pool Installation
Above Ground Pool Liner Installation
Above Ground Oval Installation
AGP Pool Help - Everything on this site about Above Ground Pools
Every Pool Owner Needs This
Hire The Pool Pro
Private Counsel
My E-books and Kindle Books
Do It Yourself
Pool Installation
Overlap Liners
Expandable Liners
Beaded Liners
Oval Pools
Best Pool Buys
Ask The Pro
General Pool
Pool Parts
Pool Base
Pool Filters
Pool Liners
Pool Installation
More AGP Help
AGP Help Center
Pool Questions
With Answers
Everything Else
Above Ground Pool


