Quest Oval Pool Installation
In New River Arizona

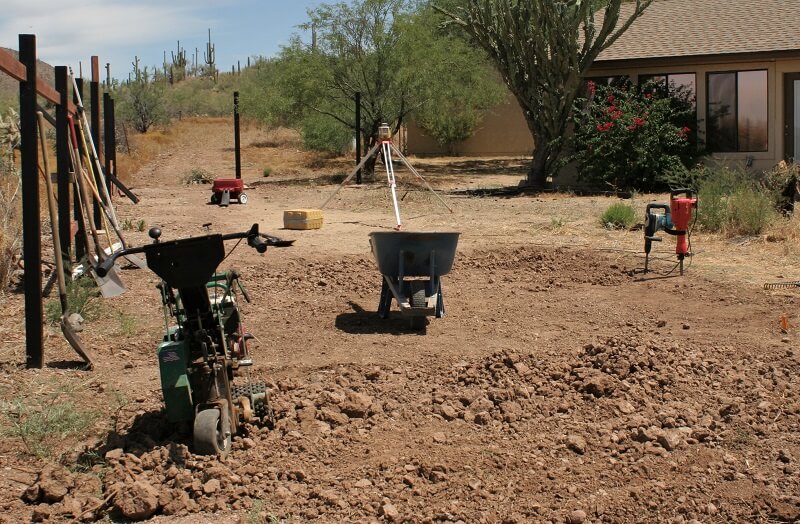
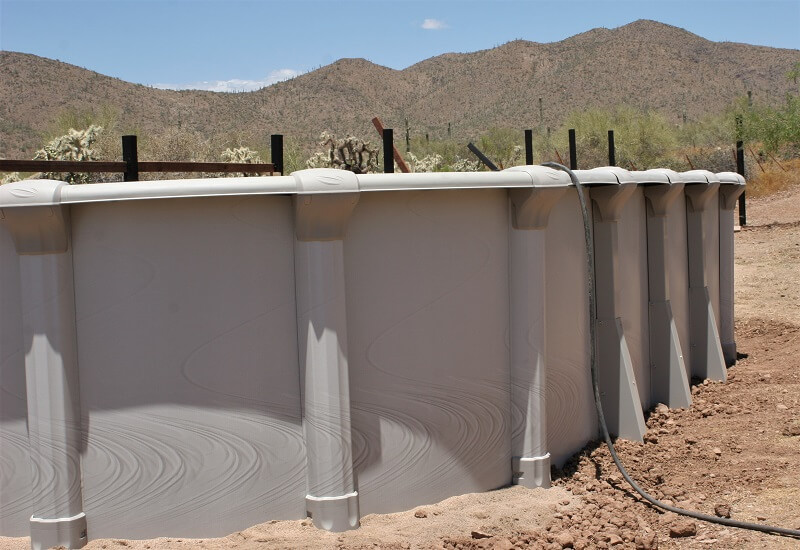
Today we are building a 12' x 24' x 54" Quest Oval above ground pool. The kit was ordered by the customer from the Poolfactory.com. It is one of the Wilbar brands and a very good quality pool. As with most of the poolfactory pools the boxes arrived with everything the customer had ordered and all the parts were there. This turned out to be a yard where some larger equipment would have been nice but since most of the yards we go into only have small side gates we only have equipment to fit these yards. Keep in mind the photos can be enlarged by clicking on them.

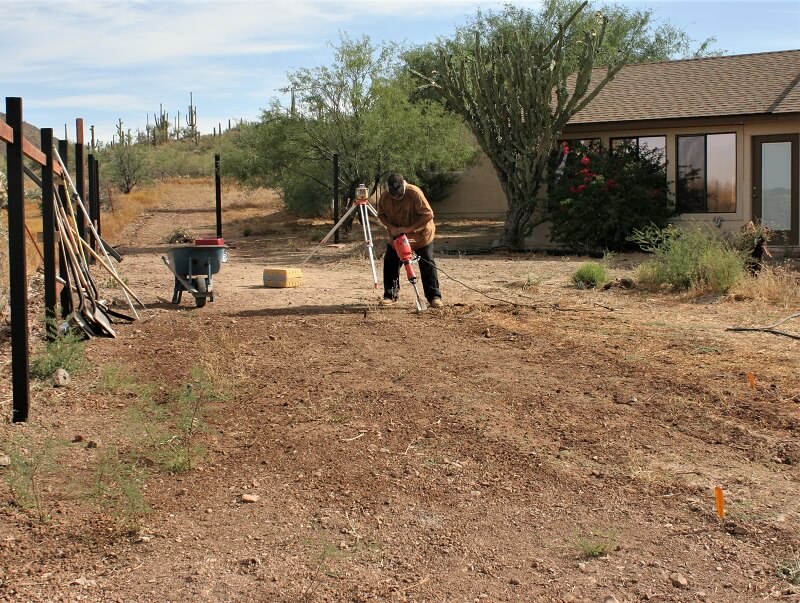
It is hard to tell from the photos just how far off level this pool area is but with the laser set up we find it is nearly a foot from end to end. This is a mountain side location and the ground is more rock than dirt and even after a good dose of water the sod cutter would do nothing to cut through it, so out come the jackhammers.

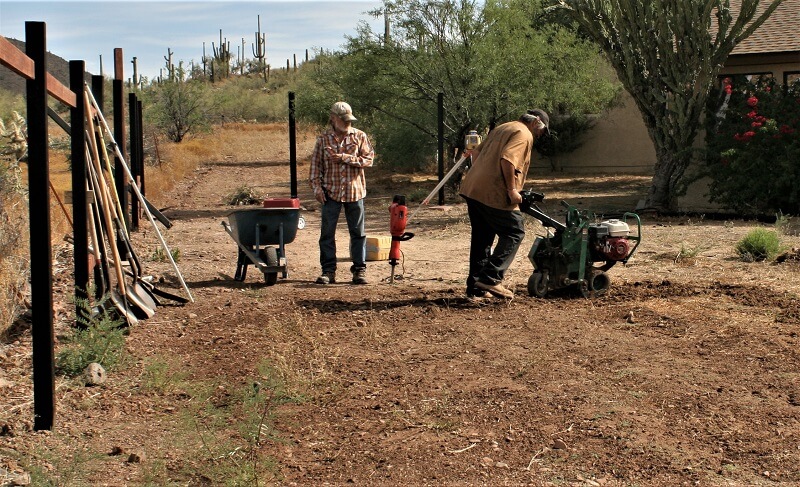
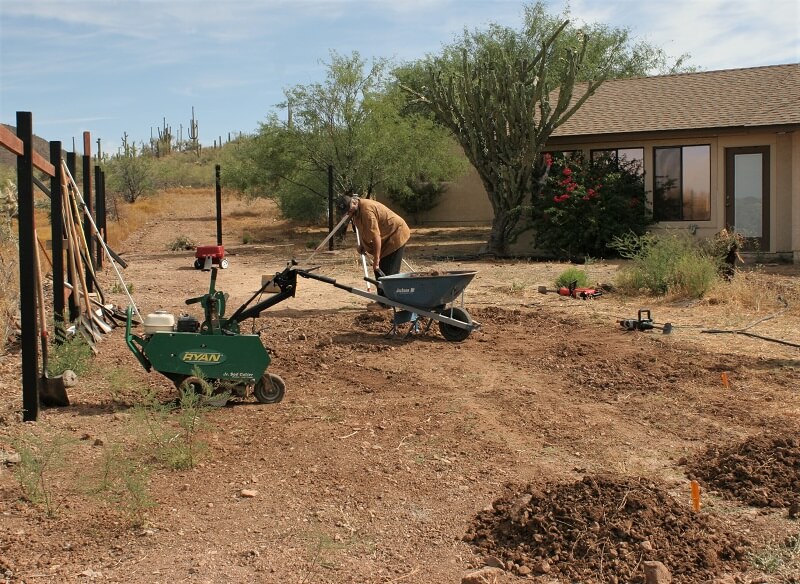
Our method of leveling would be to loosen the ground with the jackhammers and then run the sod cutter over the area to cut the ground into smaller pieces that would be easier to shovel into the wheel barrel. The dirt is then taken to the low area, spread out and packed into place. This goes on over and over again until the high end is cut down low enough.

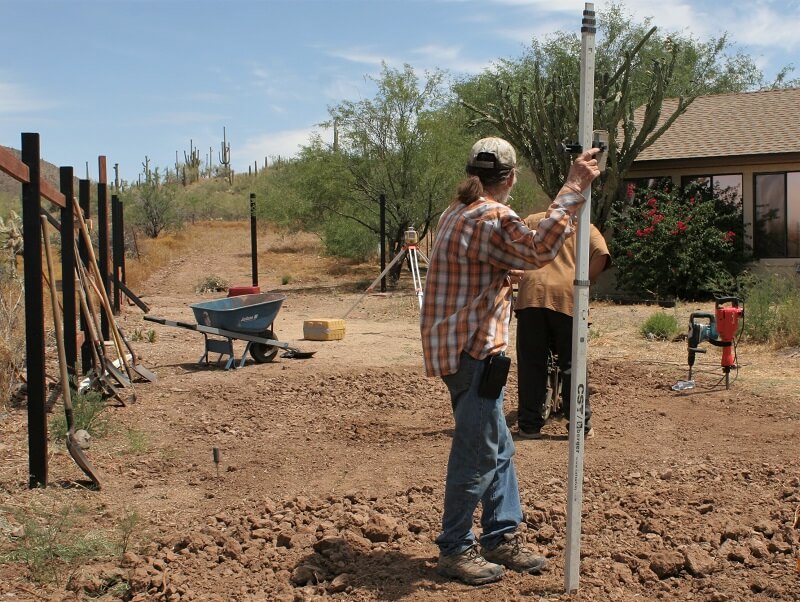
Checking the level as we work, we want the entire area to be well within an inch of being level before we begin to think about opening the pool boxes.

As the dirt gets taken to the low end it is broke up some more with the sod cutter blade and then with the blade raised up the same machine is used to pack the ground. When using this method of leveling be sure a sufficient ledge, extending beyond the pool area, is provided on the raised end. Using water and a heavy packer this is usually all that is needed. If your ground will not cooperate you may want to consider a load of crushed granite, or something similar.

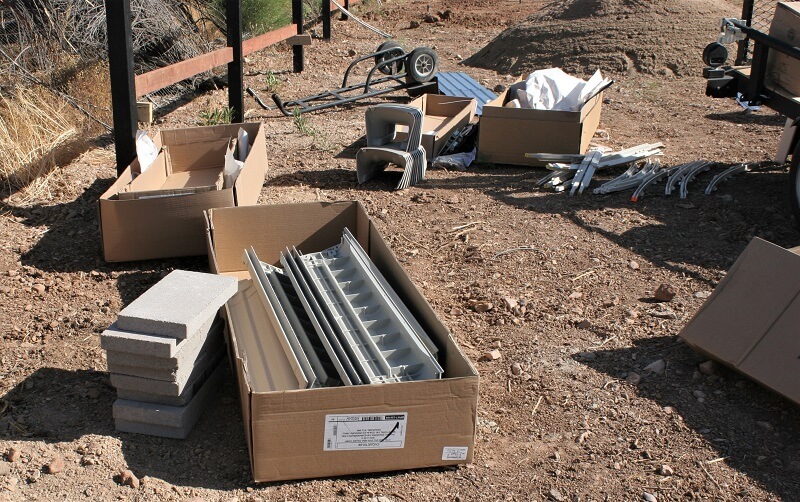
Finally we get to unpacking the boxes. The blocks next to the box are used under the side braces. As always the pool is well packaged, no damage and all the parts are there.

While the braces are being built I lay out where the trenches should be dug and start the digging process. The trenches are only 2 inches deep with another 2 added in the rear for the block, but in this ground it seemed like a foot for each one.

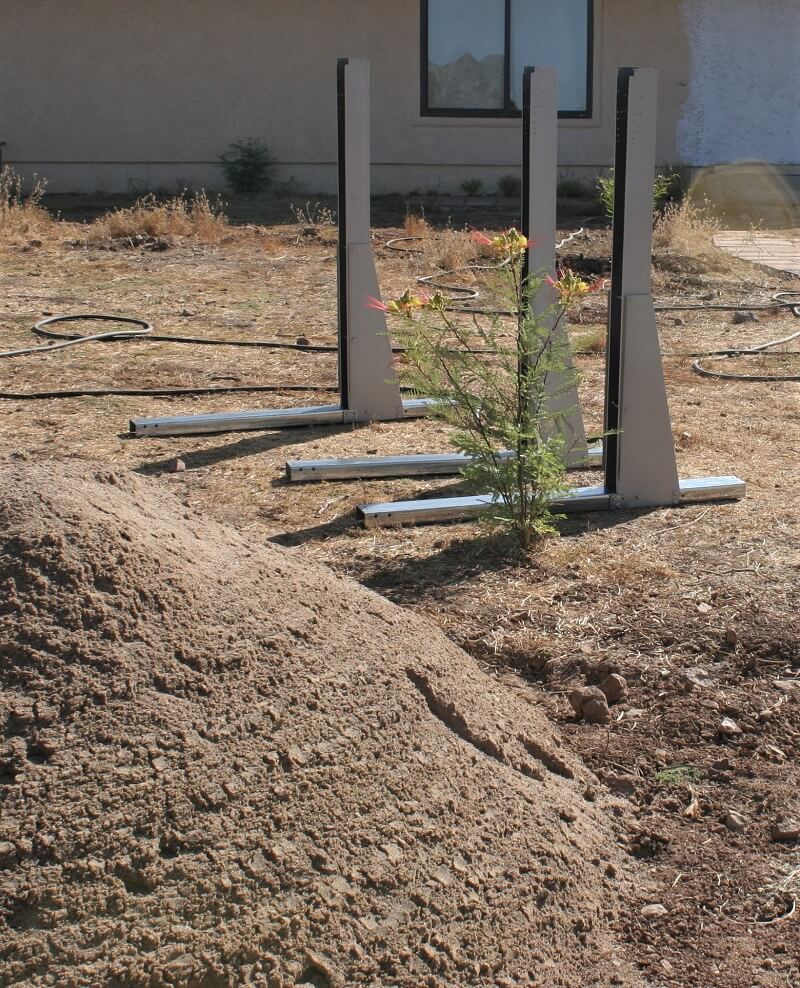
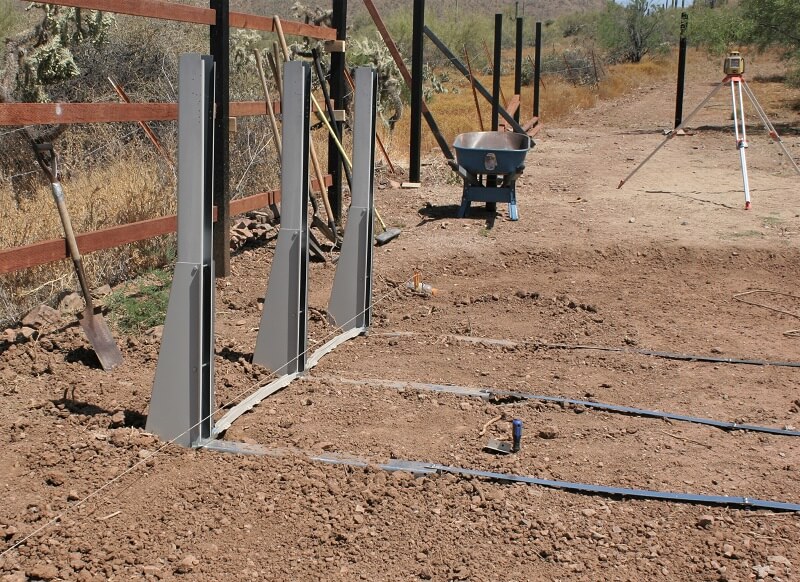
These are the braces for one side finished, just waiting on the trenches to place them in.

This is a closer look at a side brace being assembled. The instructions for this pool are pretty straight forward in this part of the assembly, just be sure the little gusset plates are installed correctly and all the bolts are tight, but only tighten after they are all installed.

One side is set and the straps attached. There is a block under the rear of the assemblies and the laser level was used on the front and rear of each channel to insure the are all level with each other and plumb up and down.

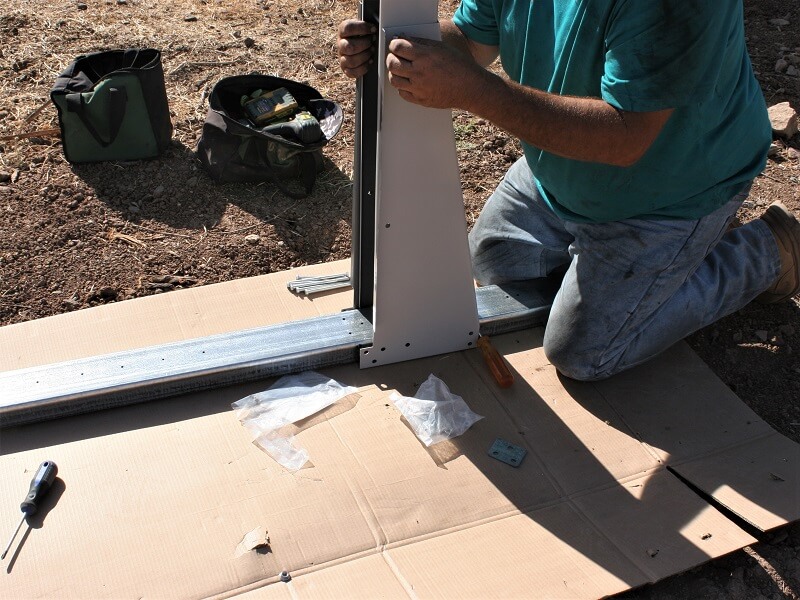
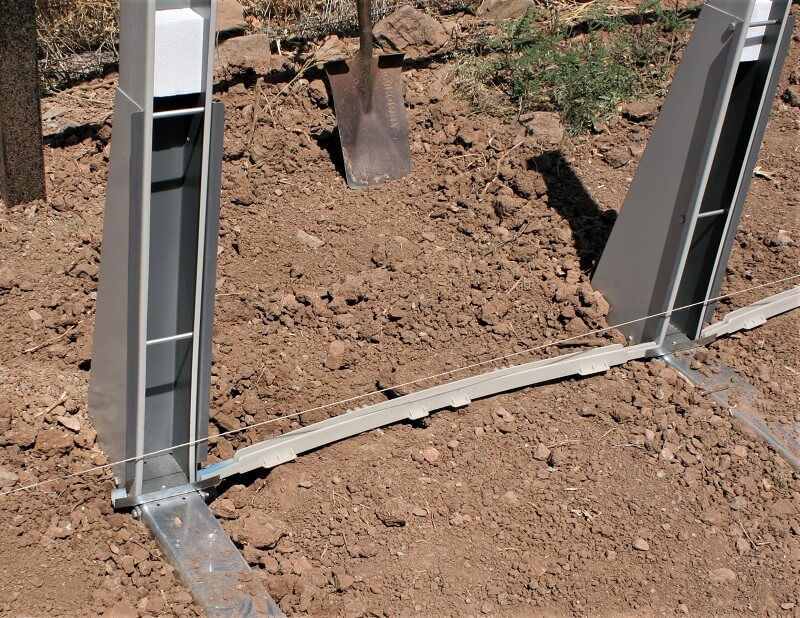
This is where I deviate from the instructions. First, I use the foam pieces inside the uprights instead of the channels, either way is fine but this way keeps the top bolt from being over tightened and squeezing the upright. I also set one side completely against a string line before proceeding to the other side. Once the first side is set, straight and level I connect the straps and lay out the other side. The opposing side is then connected to the straps and squared with the set side before any digging takes place.

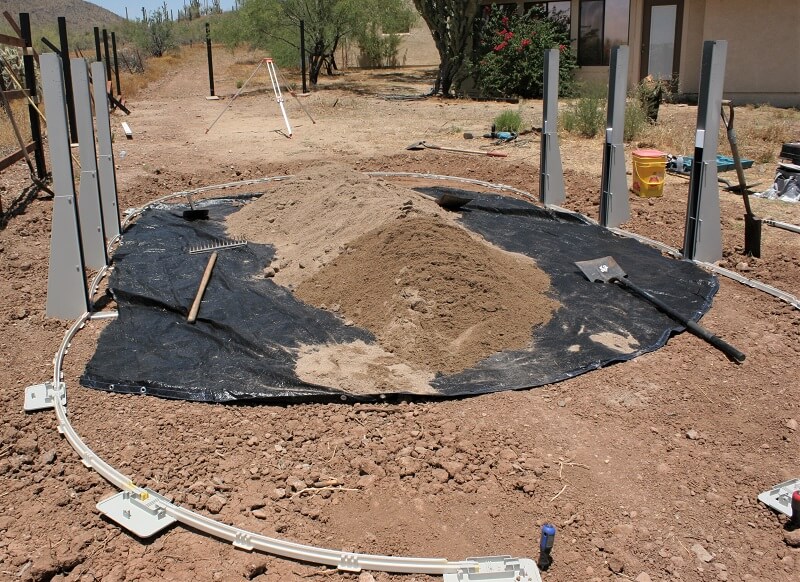
With the end rails in place and leveled we start moving in the sand. I normally do not use a ground cloth but I thought the ground conditions here would benefit from one. The sand is piled in a line down the center of the pool and gets spread out and smoothed once the pool wall is up. We always level with firm dirt, never the sand. We also don't want that sand anywhere near the bottom rails until the wall is up. It can be hard enough getting the wall into the bottom track, even harder if it is full of sand.

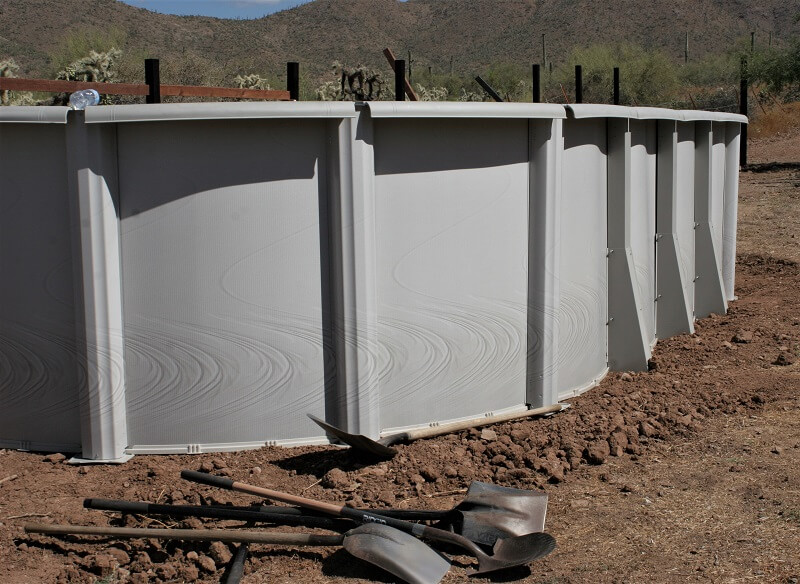
Once the wall is up I am usually inside the pool smoothing the ground and working on the sand. My helper would be installing the outside pieces. There are several reasons we do it this way, first we don't take all those measurements around the end rails to assure a perfect radius. We have enough experience to get them very close. Once the pool frame is built we can make any minor adjustments needed. I never take a chance of a wall blowing over, my pools always have the support needed to make sure that never happens, even if that means building the frame as we are installing the wall, maybe a few rails at a time.


This is where I think a lot of oval pool installations go bad. The wall goes up, the liner goes in, some water added and then the uprights and top rails get assembled. Two things can happen, the wall blows down or you find nothing fits when finishing the pool. With a completely built pool, before any sand is spread and way before even thinking about a liner, you can see exactly how the pool will look when finished. Are the ends set correctly, did the top rails fit correctly, are all the uprights plumb? Is it perfectly level? All these things should become obvious at this stage and can be easily corrected.

I use the pool frame to pull the liner over and stretch it into place, then taking top rails off a few at a time when there is enough water in the pool. But no matter how you plan to install a liner, even if you have to remove top rails to do it, build the whole pool and check everything.

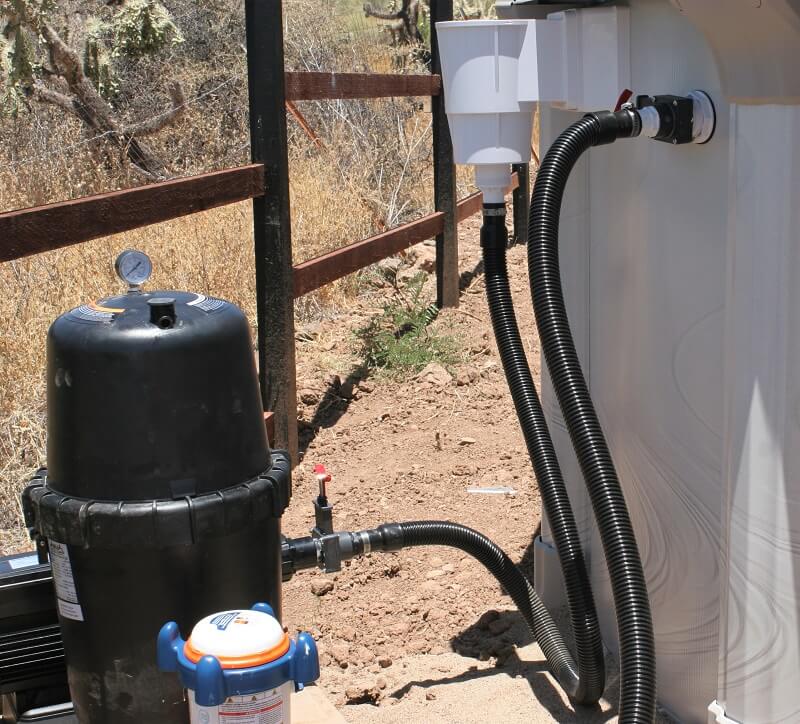
Before we leave we make sure the skimmer and return are installed and the filter assembled and hooked up to the pool.
Some of the features of this pool include the Oval Yardmore design of the side braces, it's made in the United States and comes with a 60 year limited warranty.
We do pool and liner installations all over the state of Arizona. Check the installation price page for more information.
Below are some more of my illustrated installation pages with plenty of help and advice.
Hire The Pool Pro
Contact For Installation Quote