Awning Installation
Building An Aluminum Awning
On this page you will see photos, along with instructions, to help
you with your next awning installation. These kits are not that
difficult to install with just a little installation photo help. Doing
it yourself can be a big money saver, but then again, maybe not.
Only you know your capabilities.
The first
thing I do when I start an awning installation project is to make a
pencil mark every foot along the top of the gutter and the hanger. When you
start installing the panels, keeping them square is very important.
These marks at each end will help you do that. The person
attaching the hanger end of the panel will know where the gutter person is
every foot of the way if you stay on your marks.

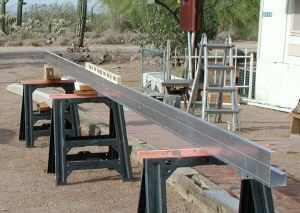
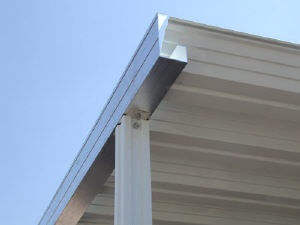
This
picture shows the column brackets installed. Inset the end posts by 1' or 1
1/2' and equally space the rest. My formula for spacing is this: If your
awning is 34' and you have 5 posts inset 18" at each end, convert 34' to 408" and
subtract 36" for the ends, you now have 372" to divide by the 4 openings left
between the 5 posts, 372 divided by 4 = 93". Starting at one end of the gutter
come in 18" for your first mark and then 93" from the first mark to the second,
and 93" from your second mark to your third, and so on until you reach the other
end with exactly 18" left over. Using these marks as the center of each post
will give you equal post spacing. The post brackets should always be held in
place with nuts and bolts. I use a self tapping sheet metal screw to hold the
brackets in place before drilling the holes for the bolts.
When marking for your posts take into account any areas you absolutely do not
want a post. I have, on more than one occasion, stood the awning up to
find a post in a walkway, planter or some other place where it should not be.
You may need to shift a post by a foot or so.

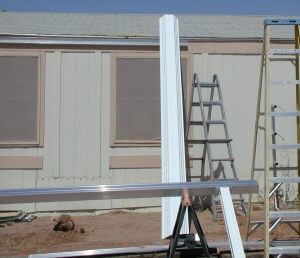
This
is one way to determine the lengths the posts should be cut in order for the
gutter to be level. Your posts will all start out either 8', 9' or 10' long.
In almost every case some cutting will be needed. Most of the time each post
will be a different length. I use a 7 1/4" skill saw with a plywood blade for
most of my cuts, a chop saw works good also. Make sure the gutter is in the
proper position, measure the distance from the home and eyeball it side to
side. Now measure from the gutter to the ground where each post will go. Now,
starting at either end, measure the distance from the hanger to the ground at
the home. Decide the amount of slope you want, at least a half inch per foot,
and subtract that from your hanger measurement. If your hanger to ground
measurement is 108" and you wanted 6" of slope on your 12' awning, your first
post would be 102". This is assuming the ground between the gutter and hanger
is level. Use a carpenters level to check this if needed. Now you know the
height of the first post it is easy to add or subtract to this measurement to
determine the length of the remaining posts. It is much easier to level the
gutter in this way, so you can cut the posts before you attach them to the
gutter, than to do it later when the gutter has been stood up and you wind up
having to trim the bottom of the posts at an awkward angle.

When I cut the posts, if I am using
the square ones, I cut the end that does not have holes drilled in them. With
my posts all cut and numbered for their position on the gutter, I attach the
bottom brackets to the cut ends. Use one of the brackets for a template and pre
drill your holes into each side of the post. Install the brackets with the long
bolts and nuts. Do not tighten them yet. Now attach each post to the gutter in
the same way. This awning did not have the color
trim yet, but this is usually the time I insert the trim into the trim grooves and the gutter is ready to stand up.
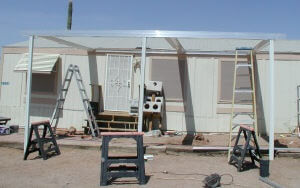
When the awning installation is complete, except for the trim, it can be
installed from the tops of ladders. It's much faster to do it on the
ground.

Now it's time to prepare and install the
hanger. I drill small holes every 6" before taking it to the house and
attaching it with 1 1/2" screws. After it is attached, run a bead of caulking
down the top edge where the hanger meets the home. You are now ready to stand
the awning up. Lay a pan against the house at both ends of the awning. With
two people standing on ladders, the hanger person attaches
the panel to the hanger and then gets down and hands one end of the gutter to
the person on the ladder holding the other end of the panel. Now slide down the
gutter lifting as you go until it is stood up. Now the gutter man should attach
his end and move to the other end, climb the ladder and hold the gutter. Now
the hanger person moves his ladder to the other end and attaches the second
panel, once the gutter person does the same the gutter is
secure. A panel at each end will hold the
gutter up. Adding one or two more panels to the center of the awning will hold
the gutter straighter and make it easier to square the awning once the first few
panels have been installed. At this point all the panels should be attached
with only one screw each at each end. This will allow the awning to pivot back
and forth as you attempt to make it square.

With
about four panels installed you can finish squaring the awning. I use a
combination of three methods. Use a large square at the gutter running up the
lock of one of the panels. They should be square at this point. Make sure the
pans are all flush and tight inside the hanger and then stand back and look at
it from several angles. If it looks good in all ways put the second screws into each
panel and add of few more. With about ten panels in place I want to get the
awning anchored so a gust of wind does not blow it away. If the awning is being
slab mounted, plumb the posts and drill 1/4" holes into the concrete with a
hammer drill, using the bottom bracket as a template. We left the bottom bolts
loose so you could move the bolt out of your way when hammering in the rawl
plugs. Now you can tighten all the nuts and bolts at top and bottom. If you
are using ground anchors it's time to dig the holes. I bolt the brackets to the
ground anchors first and when the hole is finished I bolt the assembly to the
post. When the posts are plumb, pour a bag of post hole concrete around each
one and add water. Now it is time to finish installing the rest of the panels.
If you remember to stay on your foot marks you will end in the right spot at the
hanger and the gutter.

Now
it's time to measure and cut the side fascias for each end. I cut the end that
meets the home and leave the gutter end a square cut. A slight miter makes the
fascia fit tight against the home. Before putting the fascia up it is a good
idea to install the 2" color trim and dam the ends of the gutter. I use
caulking and a small piece of color trim to dam the gutter ends. Attach the
fascia to the hanger and the gutter at the ends and them go down the top and
screw down thru the fascia and into the panel every 6" - 12". You can now
attach the tops of your downspout assemblies to the gutter on the outsides of
your end posts. With the tops installed I use a spade bit or a hole saw to put
a 1 1/2" hole into the gutter. Then you can finish installing the downspouts.

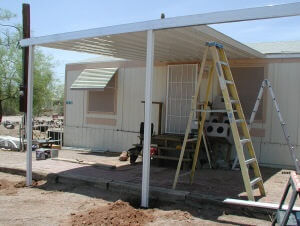
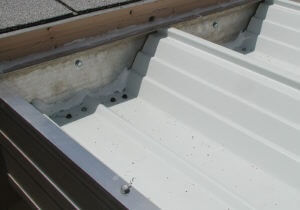
This
picture shows the top of the awning installation before the flashing is installed. I have
done two things here to add strength to the awning. I used two screws in each
panel valley instead of the usual one. I also ran a bead of caulking along the
bottom of the panel against the hanger. This helps seal the awning and reduces
the possibility of movement or vibration during a strong wind. Feel free to
contact us if you have
any further awning installation questions. Use this
form if you would like a free awning
installation quote. We can install
aluminum awnings,
aluminum window awnings,
alumawood awnings
and
shade screens
in the Mesa Arizona area. We can also build
decks and
sheds. CR Shades - Dennis Gourley - Sales - 480-935-2848
top of Awning Installation


